‏إظهار الرسائل ذات التسميات android m. إظهار كافة الرسائل

الخميس، 21 أبريل 2016

Use Bluetooth to boost your GPS data

Improve the accuracy of location-based apps by connecting to an external GPS receiver....


 It may be the case that you’ve simply lost trust in your mobile’s GPS after it failed to take to you to where you wanted and instead almost had you drown in a nearby lake. But we’d encourage you not to dismiss your phone’s GPS. The GPS receivers in mobile devices have become increasingly accurate. Moreover, their integration with Google Maps and other apps that use location data makes smartphones convenient tools for determining where you are or where you’re going. Yet, most phones cannot match a dedicated GPS receiver for speed and reliability, especially in remote areas where you might not get a wireless signal. Thankfully, you can get the best of both worlds by pairing a Bluetooth GPS unit with your Android phone. Then, whether you’re driving or on foot, you can give your apps access to accurate location data anywhere.


  • Scan for devices


Before you can receive location data from an external Bluetooth GPS receiver, you need to pair it with your phone or tablet. Go to your Settings app, activate Bluetooth and tap Scan. If your mobile device discovers the GPS receiver’s signal, it will appear under Available devices. 

  • Pair them up

Tap your GPS receiver’s name under Available devices. Some Bluetooth devices require you to enter a numerical code to confirm pairing. If you get this prompt, enter the code that came with your GPS or 0000 if it doesn’t have one. This should pair and connect your two devices.

  • Get the app

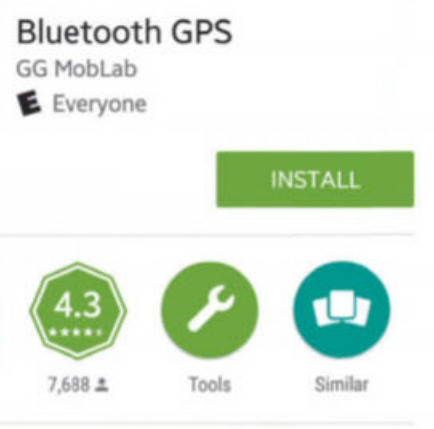
To access data from the e al GPS receiver you will need to install a third-party app from the Play Store. For this tutorial we used Bluetooth GPS. It’s free, has an easy-to-use interface and is compatible with GPS units that conform to NMEA standards.

  • Reveal hidden features


Your location-based apps can’t access data channeled through Bluetooth GPS until you override your phone’s internal GPS receiver. Go back to Settings and tap About device. Then look for Build number and tap it repeatedly. This should unlock your device’s concealed Developer mode.


  • Allow mock locations

Once you have unlocked Developer mode, it should appear in the Settings app. Tapping on it will open up a new list of options that have tick boxes next to them. Ignore those that refer to debugging and look for Allow mock locations. Tap on its tick box to approve this setting.

  • Find your receiver


Exit the Settings app and launch Bluetooth GPS. It will open to a screen titled Main where location data will be shown after you connect to your GPS receiver. Tap on the dropdown list beside the Connect button to see all your paired Bluetooth devices. Select your GPS unit.

  • Connect over Bluetooth

With your GPS receiver selected, look below the dropdown box and select Enable Mock GPS Provider. This confirms that you want location-based apps to receive data from Bluetooth GPS. Tap the Connect button to begin receiving positioning data. 


  • Eyes in the sky

You can tweak settings in Bluetooth GPS from a menu that can be accessed by tapping the three dots in the top-right corner. If you swipe right to left, you can also get a graphical display of satellite strength and accuracy. These indicate how reliable the GPS data is.


الثلاثاء، 5 أبريل 2016

10 Things You Need To Know About Unlocking New Android Functions


  • Most extra functionality is actually free

We’d be preaching to the converted, stating the obvious and sounding rather out of touch if we said phones did more than make calls these days. But the truth is your device is most likely capable of doing more than you’re currently using it for. Android has become rather versatile over the years and there are always new and useful tricks to learn, whether it’s delving into Settings to change the font size or pressing power twice to open the Camera app.


  • Small screens can take control of big screens

Check if your Android device has an IR blaster. If so, you can use it to control your television, set-top box, media player o All you need is a decent app such a WiFi which works with brands such as Samsung, LG, Panasonic and Sony, but lots of television companies such as Sky have their own apps and services that enable you to exert extra control Use the Sky+ app to record shows on your Sky+ HD box when you're out and about.


  • Chrome cast’s streaming quality can be adjusted

You can stream Spotify audio with the latest Chrome casts, but to unlock more functionality from video, you can quickly optimize it. We know it’s annoying when your streaming flicks are buffering and interrupting your viewing. If you’re casting from your computer though, you can experiment with the playback quality. Grab the Google cast extension for the chrome browser and select options, choose between 480p and a high or extreme 720p. There's a max 1080p for when everything is working as well as it should be.

  • You can remotely control a desktop computer 

Should you be out and about and suddenly realise that there’s something on your desktop PC that you really need to get hold of, your Android device can become your lifesaver. Using a Chrome browser on your desktop, install the Chrome Remote Desktop extension and it’ll steer you through the whole process of tying your Android device to it. It’s great if you want remote access to files and apps and it means you don’t have to cart laptops around with you. 

  • There’s a Night Light function for easy reading

To make it more pleasurable to read a book on your device in the dark, Android gave users a night-light as an early Christmas present, but a lot of people still haven’t opened it. Fix that by updating Google Play Books on your tablet or smartphone. You will see a pop-up explaining the new function, but if you miss it tap the A menu icon and select the mode from there. It will adjust automatically from that point on.

  • USB-C is currently a USP, see?

Android lets you plug a USB OTG cable into a handset’s micro-USB port and plug peripherals including keyboards and mice into your device. This is great when your stubby fingers don’t hit the touchscreen quickly or accurately enough, but new Android 6.0 devices also support USB Type C, which lets you transfer data at top speeds, and multitask as well. Of course, you don’t always need a wired connection – Android devices let you add peripherals via Bluetooth too – but USB Type C in particular widens a tablet or phone’s functionality.

  • Hear crystal-clear audio...

Audiophiles are always looking for ways to get the best sound from their music and it looks like one company has come up trumps. Chord Electronics’ Mojo is a both a Digital to Analogue Converter (DAC) and headphone amplifier that connects to an Android device and pumps incredibly clear sound into your ears. It’s on the pricey side at £399 (hey, we didn’t say all extra functionality was free) but it will turn your device into a professional-sounding music hub.

  • Devices can be turned into big-screen gaming controllers

As well as downloading the Tin core Key mapper app and using a traditional controller with your device (letting you create a key map that corresponds to the buttons and movement of the controller), more games are being supported by Chrome-cast. Cast games to the big screen and use an Android device as a controller. Given that touchscreen technology has been revolutionary, this opens up further possibilities.

  • Your handset can become a wallet

Android Pay is being widely used in the United States but if you – like us here in the UK – can only sit and wait while the service rolls out where you live. you may be pleased to know that some banks are talking matters into their own hands. Barclaycard has added a contactless NFC payment function to its android app. It can be used to make payments anywhere there is an NFC reader. Other banks may well start to follow suit.

  • Finding a hidden game is part of the fun

Android likes to hide treats in the operating system and Marshmallow is no exception. Go to the Settings and select About before tapping numerous times on the section labelled Android Version. In an instant a large marshmallow will appear on the screen, and if you tap and hold on this then you’re taken to a Flappy Bird-style game. Press the + button that appears and you can even add other players for some cool multiplayer action. 


الجمعة، 11 مارس 2016

Quick Guide:- How to get your Android Devices speed boosted without Root Access

Speed up your touchscreen with this easy to use app that doesn’t cost a thing 


A lot of the apps that speed up your Android device require root access. If that’s not something you’re comfortable or familiar with, then your options can feel a bit limited. The Super Touch app doesn’t require you to have a rooted device though and it does some pretty impressive things without you needing to have much, or really any, technical know-how. All you will need to get things up and running are your Android device and a Wi-Fi connection. The app isn’t a huge download and it walks you through a lot of what you need to know. Unfortunately, the translation isn’t great, so we’ll guide you through the process. It shouldn’t take you very long to get things sorted and while there are a few fiddly bits that might require a little more attention, with a bit of perseverance you’ll soon be swiping around your Android phone or tablet with the sort of speed and grace you didn’t think was possible.

“It does some pretty impressive things without you needing to have much really any, technical know-how”

Steps:- 

1. Download The Application

First up you will need to grab the app from the Google Play store. It looks like this and it’s not a particularly large download. It shouldn’t take too long to install on your Android device and when it has done, you’ll open it up to a brief tutorial across a number of different screens.

2. The Easy Tutorial

Swipe through the first screens as though you were flipping through a book – there’s about three of them. Have a read and you’ll come to a screen that explains things in a little more detail. The first time you see this, it will have a button marked Advanced at the bottom.

3. Tap the Advanced button.

Hit the button marked Advanced and you will be taken to another menu. Here you will be able to fi nd out whether your device is powerful enough to run some of the much more interesting features that are available on the app. If it is, you can tap to get them up and running.

4. If you go back

The Advanced Settings link in the drop-down menu will now always tell you that you have enabled those settings, so you can pretty much ignore it for the rest of your time with the app. It does include a help email address if you want to suggest tweaks to the app.

5. Head back to the menu.

When you have set up the Advanced Settings, go back to the main menu. Now tap the button that starts up the smoothing process. You will see a pop-up window that shows you the progress. If your phone is likely to lock in a couple of minutes, then turn off that particular setting.

6. Start it off

Once the progress bar has filled up, you will see another pop-up window. You can scroll down and read about some of the changes you have just made. When you’re done tap Start and Share. You don’t actually have to share anything, but the app does give you the option to.

7. Start the battery save

When you have Smooth Touch up and running, you can engage the battery saving options as well. Rather than giving you a list of options, the app controls everything for you. Tap the button and it will set it up automatically. You can quickly turn them off with another tap.

8. Is it enough?

If you find that the default setting isn’t powerful enough to actually make that much of a difference to your swipes and taps, then you can slide the marker further up the scale on the main page to make the touchscreen more sensitive. This will turn off Super Touch though.

9. Start it again

When you’ve selected the sensitivity you would like, tap the button to start up Super Touch again. Follow the same process as before, preferably avoiding locking your screen and then check to see whether the new sensitivity level suits you. Repeat as many times as you’d like.

⭐key Features / Advantages⭐

  • Change sensitivity

In the middle of the screen there’s the slider that lets you adjust the sensitivity of your touchscreen gestures. It’s set to 190 by default, but you can alter this by moving the slider either to the left or right. It goes up to 9,999.

  • Stay unlocked

Tapping the Start Smooth Touch button will begin setting up your phone for the new process. It’s best if you don’t lock your screen when this is running, as it can interfere with what the app is trying to achieve.

  • Main menu

This is the main menu page of the app. It contains most of the things that you’re going to need to play around with. In the top-right corner, there’s a menu that opens up advanced options and an About+help section too.

  • Save battery

The Battery Save option underneath the Start Smooth Touch button lets you quickly set up some power-saving options that tie in with the speed-up touch. They’re not massively detailed, but we will have a look at them in the main body of the tutorial.

الخميس، 25 فبراير 2016

Get Samsung Galaxy Edge Style Notifications On Your Android Device...

Get Edge-style notifications about incoming phone calls on any Android device
The Samsung Galaxy S6 Edge came with an innovative way of displaying notifications - illuminating the bevelled edge along the side of the screen. Now even if you don’t have an S6 Edge, you can still get a taster of this Edge display using the Edge Color Notifications app.
The drawback is that no device other than the S6 Edge has that bevelled edge, so the app compensates by illuminating the edges of your screen with animations instead. You can also assign specific colours to your important contacts, so you can see who’s calling at a glance. You can even tell the app to reserve animations for the contacts you’ve assigned a colour to, so if you see an Edge-style notification, you’ll know someone important is calling!

STEPS TO STYLE...

1. Enable settings

Download the Edge Color Notifications app from the Play store and launch the app. To set up Edge Color Notifications, open the side menu and select Home. Enable both the People Edge and Phonecall notification options. Open the side menu and select Phone Call Settings.

2. Customise Your Columns

You can customise the Edge effects for when you receive a phone call. This includes changing the width of the animated columns (so the effect is more noticeable or subtle) and changing the column’s default colour. You can also choose from a list of animations.

3. Left, Right Or Both

One of the most important changes you can make is choosing which side of the screen your animations will appear: left, right or both. If you select the Full Border animation, your columns appear around every side of the screen, regardless of what you select here.

4. Assign specific colours

By default, Edge Color Notifications will apply the same colour to every single person in your contact lists, but you’ll usually get more value out of the app by assigning specific colours to people. To do this, open the side menu and select Contacts Colors.

5. Choose a new colour

You’ll see a list of all your contacts, with the same default colour next to each contact. To assign someone their own colour, tap the block of colour that appears next to their name and choose a new colour from the pop-up that appears. Tap OK to save your changes.

6. Be Selective

Once you’ve finished assigning colours, you can restrict Edge Colour so that it only displays the Edge animations for contacts that you’ve assigned a specific colour to. If this is the case, return to Phone Call Settings and select Only show contacts with specific color set.

Enjoy your Edge notification Style device...

السبت، 20 فبراير 2016

#Hacker zone - Underclock for better battery life...


A few choice tweaks to your kernel settings can also extend the life of your battery Changing the clock speed is always about finding the right balance between power and battery life. Overclocking will likely require you to sacrifice a little of the latter.

Underclocking is the opposite: it involves reducing the speed of the processor in an attempt to extend your battery life.It isn’t a magic wand. Underclocking causes some tasks to take longer to complete, which offsets the benefits of having the processor using less power at its maximum level. Nevertheless, for some tasks it can be beneficial and switching the governor can have noticeable effects. As ever, the best approach is to experiment with settings to find ones that work for you. And don’t push things too far – if you set the processor clock speed too low it may not deliver enough speed for your apps to work. 

1. Set up the app

In EX Kernel Manager, create a backup of your existing kernel settings. Open the sidebar and select Tools, followed by Kernel Backup. Tap the disk icon to create the backup and give it a recognisable name should you need to restore it someday.

2. Reduce the clock speed

Now go into the CPU settings. Underclocking is the same as overclocking, except in reverse. Try experimenting with lower maximum frequencies, so that your phone runs at a slightly slower speed, causing it to use less power. Just don’t overdo it!

3. Change the governor

You also need to adjust the governor settings. The obvious one to use is the Powersave governor, which locks the CPU to the lowest frequency. However, you might do better with the Performance governor, so that tasks will complete in the shortest possible time.

4. Test the changes

Exit the app and then test your changes. Open a few apps or games and run a few common tasks. It’s likely that you’ll notice the phone is a little slower, but if it’s too slow then you will need to tweak your changes. You want to find a balance between speed and batter.

5. Explore Powersave mode

The EX Kernel Manager also has a Powersave utility. This is activated by tapping the leaf icon at the very top of the app’s screen. This mode sets the processor to run at predefined levels and enables you to quickly reduce power consumption.

6. Tweak settings

To change the Powersave mode settings, tap the three-dot menu icon and choose Settings. You can set Powersave to activate automatically on a certain battery level or hit Advanced settings to reduce the CPU speed even further. Again, keep your changes small.

Enjoy Great New Powerd Life....

الخميس، 24 سبتمبر 2015

Redesign AOSP with WanamKit

Better known for customing TouchWiz, Wanam Kit also Works With Vanilla Android too


There are countless Android ROMs out there, but unless you build the ROM yourself, chances are there are always going to be one or two things you would like to change. Wanam Kit originally found fame as a means to de-bloat Samsung’s TouchWiz user interface, which was notorious for its excessive bloatware until the Galaxy’s S6 feature cull. However, Wanam Kit also works with stock ROMs as the Xposed module lets you make a wide range of tweaks to any ROM based on the Android Open Source Project (AOSP). These customization include visual changes such as replacing the standard battery icon, to more functional changes such as disabling lollipop’s new heads-up style notification system. Once you’ve installed Wanam Kit, you can make your changes by exploring the app’s various menus and then disabling or enabling the different options as desired. Before any of these changes become active, you need to reboot your device, so the only downside is that if you want to experiment with a few different changes then you may need to reboot several times before you’re happy with the end result. This module requires root access and the Xposed framework. If you haven’t installed Xposed, Lollipop users can find the necessary files and instructions at the XDA Developer thread goo.gl/DFXwGg. If you’re running an earlier version of Android, you can install the Xposed framework via an in-app updater, available from goo.gl/PAGTpi.

Steps:-


  • Activate Wanam Kit

Download Wanam Kit (Xposed) from the Google Play store. Open your Xposed Installer, tap Modules and make sure that Wanam Kit is selected. To activate this module, reboot your device. Then open your Wanam app. At this point, you’ll see the main Wanam menu.


  • Customizable status bar
Select Status bar. In this section, you can customize the stock status bar, including changing the battery icon. You can replace it with a circle battery icon, hide the battery icon completely, or display the percentage of battery remaining by selecting ‘Show Battery Text’. 

  • Tweak your battery text
If you do choose to ‘Show Battery Text’, you’ll get access to some additional options that allow you to customize this battery text. You can change the colour of the text, the typeface/font used, and the typeface style by choosing from Italic, Bold or Normal.

  • Edit or hide your clock position
You can change the position of the digital clock that appears towards the right of the status bar. To make this change, tap Clock position and choose from Right, Center or Left. You can also remove the clock completely by tapping Clock position and then Hide.

  • More detailed notifications 
Do your notifications fail to give you enough details at a glance? You can enable the ‘Expand all notifications’ option so that all notifications appear expanded. The Status bar section contains several options, including enabling and disabling Lollipop’s heads-up notifications.

  • Additional options for notifications
When heads-up notifications are enabled, you have additional options. If you have a habit of dismissing notifications and forgetting to act on them, you can enable Ongoing notifications. You can also increase the delay before you can dismiss a notification using ‘Heads up delay.’ 

  • The advanced power menu
If you’re constantly booting into your bootloader or recovery, you can save time by adding these to your power menu. Exit the Status bar and select System from the main. Select Advanced reboot > Reboot options and select Soft reboot, Recovery or Bootloader.

  • More menu options 
There are two other options you can add to your advanced power menu. The first is Enable mobile data where you add an option to turn your mobile data on and off. The second is Quick dial, where you add a telephone number to your power menu.

  • Quick dial shortcut 
To add a quick dial shortcut to a telephone number of your choice, tap Quick dial number and then enter the telephone number. If you want to disable this feature at any point, select Quick dial number again, but this time delete the entire number and tap OK.

  • Improve device’s performance 
Even if you dismiss an app, it can leave processes running which has an impact on performance. Using Wanam, you can kill all processes running in the foreground; just long press your device’s Back button. To activate this functionality, select ‘Long BACK kills process’.


Hide your root access from prying apps

Just because you rooted Android shouldn’t mean you can’t use your favorite app...


 You’ve rooted your phone or tablet and can now enjoy previously unavailable apps and additional functionality. The problem is, some of the apps you were using previously no longer run. In order to maintain the integrity of their products, some app developers opt to disable their apps (or restrict them) if they’re found to be running on a device that has been rooted. If you’ve spent some time trying to get your device rooted (we all know that it isn’t always easy) then this can prove particularly frustrating. To work around this, you will need to fool these apps into thinking that the phone has not been rooted at all and for this you will need RootCloak Plus, which requires the Xposed Framework. While there are other solutions are available (such as the Hide my Root app by Amphoras on Google Play), RootCloak will give you the best results.

Steps to go:- 


  • Ensure Xposed has been updated

Before installing RootCloak, ensure your Xposed Framework is up to date. You need v2.4.1+ with XposedBridge v42+ installed. Open the app, go to Framework> Install/Update to confirm this and wait while the framework updates.

  • Install RootCloak

Next, browse Xposed’s Download section for RootCloak and install by tapping Download. Follow this by rebooting your phone: tap Framework> Reboot. You will now be able to start configuring RootCloak to hide or cloak your root status from certain apps.

  • Problematic apps

The chances are that any apps that are causing you trouble have already been included in RootCloak’s list. This means you don’t need to configure the app! To check, open the app that was complaining about your rooted phone and see if it displays a nag message. 

  • Configure RootCloak

Xposed-compatible apps can be opened from your Android launcher without opening Xposed Framework first. Open RootCloak from the launcher and view the menu. You’ll mostly use Add/Remove Apps for this, but if the app you want to block isn’t listed, tap + to add it.

  • Stop blocked app

If the app you’re trying to run continues to nag you about your phone’s root, it’s likely that you will need to stop it. Open Settings > Apps, find the app in question and tap Force Stop. This will require the app to restart and check permissions before launching

  • Last resort

Using RootCloak should help you persuade root-phobic apps to run, but if this doesn’t work check the Debug log where you should find answers. With persistent issues, run the app in a non-rooted environment, maybe an Android tablet or switch to a more usable app.