‏إظهار الرسائل ذات التسميات battery saver. إظهار كافة الرسائل

الأربعاء، 20 أبريل 2016

Back Up While Charging Your Smartphone

Android phones are like mini-computers, holding lots of precious data. 


Yet it’s fair to say many of us still fail to back up our contacts, calendar entries, messages, photos, videos and music regularly enough, meaning that losing your handset, having it stolen or dropping it beneath the wheels of a passing lorry is likely to cause you pain in more ways than one. MEEM seeks to take the hassle out of backing up. As long as you have Android 4.1.2 and above, you can make use of the accompanying free app and see data whizz across to the device in just six minutes, locally storing your data without the need for you to even think about it. The maker promises that your data will be protected by built-in security and the use of an authentication code. We’re also told that version 2.0 of the app is pencilled in for June and will be compatible with tablets, work with documents, allow you to partition the device and let you store data that you don’t want on the phone.


At a glance

» Product name MEEM 
» Available from meemmemory.com
» Price £49.99
A wired charger that automatically backs up the personal data on your Android phone when you plug it in


How It Works


Questions  & Answers

  • What gave you the idea of placing a back-up system within a phone charging cable?
>>  Anil Goel founded MEEM with a product that he originally got working on Symbian phones around seven years ago. He came up with the idea to try and create something that is seamless, useful and doesn’t require users to remember any more than they have to already.

  • Was it difficult to produce?
>> Technically, it’s not an easy thing to create. MEEM is not a simple pen drive, put it that way, because it takes whatever data is in your phone and converts it into its own language, converting it back when needed. It’s secure and safe and it can be used with different types of phones. 


  • Doesn’t the cloud perform the functions of MEEM just as well?
>> The problem with the cloud is that there are people who don’t quite understand it, so there are lots of people who don’t and so aren’t backing up regularly. There’s also the cost of storage with many companies charging for larger amounts of memory, and there’s a growing number of people worried about who has access to their data: are providers or a government agency watching? There are also 2.6 billion phones out there and not everyone has the opportunity to back up to the cloud.

  • What happens if you lose the charger – could anyone ever access the information on it?
>> We have 256 levels of security and we’ve conducted research that has found that MEEM will either stay in the kitchen or a bedside table, which is where most people charge their phone. Since we see MEEM largely used at home, it should be protected from loss.

  • Is there any difference between the Android and iOS chargers?
>> Android is open architecture and Apple is closed architecture. We can give people a more fulfilling experience with MEEM on an Android phone, which is why it can back up more categories than the Apple chargers can. 

الجمعة، 11 مارس 2016

Quick Guide:- How to get your Android Devices speed boosted without Root Access

Speed up your touchscreen with this easy to use app that doesn’t cost a thing 


A lot of the apps that speed up your Android device require root access. If that’s not something you’re comfortable or familiar with, then your options can feel a bit limited. The Super Touch app doesn’t require you to have a rooted device though and it does some pretty impressive things without you needing to have much, or really any, technical know-how. All you will need to get things up and running are your Android device and a Wi-Fi connection. The app isn’t a huge download and it walks you through a lot of what you need to know. Unfortunately, the translation isn’t great, so we’ll guide you through the process. It shouldn’t take you very long to get things sorted and while there are a few fiddly bits that might require a little more attention, with a bit of perseverance you’ll soon be swiping around your Android phone or tablet with the sort of speed and grace you didn’t think was possible.

“It does some pretty impressive things without you needing to have much really any, technical know-how”

Steps:- 

1. Download The Application

First up you will need to grab the app from the Google Play store. It looks like this and it’s not a particularly large download. It shouldn’t take too long to install on your Android device and when it has done, you’ll open it up to a brief tutorial across a number of different screens.

2. The Easy Tutorial

Swipe through the first screens as though you were flipping through a book – there’s about three of them. Have a read and you’ll come to a screen that explains things in a little more detail. The first time you see this, it will have a button marked Advanced at the bottom.

3. Tap the Advanced button.

Hit the button marked Advanced and you will be taken to another menu. Here you will be able to fi nd out whether your device is powerful enough to run some of the much more interesting features that are available on the app. If it is, you can tap to get them up and running.

4. If you go back

The Advanced Settings link in the drop-down menu will now always tell you that you have enabled those settings, so you can pretty much ignore it for the rest of your time with the app. It does include a help email address if you want to suggest tweaks to the app.

5. Head back to the menu.

When you have set up the Advanced Settings, go back to the main menu. Now tap the button that starts up the smoothing process. You will see a pop-up window that shows you the progress. If your phone is likely to lock in a couple of minutes, then turn off that particular setting.

6. Start it off

Once the progress bar has filled up, you will see another pop-up window. You can scroll down and read about some of the changes you have just made. When you’re done tap Start and Share. You don’t actually have to share anything, but the app does give you the option to.

7. Start the battery save

When you have Smooth Touch up and running, you can engage the battery saving options as well. Rather than giving you a list of options, the app controls everything for you. Tap the button and it will set it up automatically. You can quickly turn them off with another tap.

8. Is it enough?

If you find that the default setting isn’t powerful enough to actually make that much of a difference to your swipes and taps, then you can slide the marker further up the scale on the main page to make the touchscreen more sensitive. This will turn off Super Touch though.

9. Start it again

When you’ve selected the sensitivity you would like, tap the button to start up Super Touch again. Follow the same process as before, preferably avoiding locking your screen and then check to see whether the new sensitivity level suits you. Repeat as many times as you’d like.

⭐key Features / Advantages⭐

  • Change sensitivity

In the middle of the screen there’s the slider that lets you adjust the sensitivity of your touchscreen gestures. It’s set to 190 by default, but you can alter this by moving the slider either to the left or right. It goes up to 9,999.

  • Stay unlocked

Tapping the Start Smooth Touch button will begin setting up your phone for the new process. It’s best if you don’t lock your screen when this is running, as it can interfere with what the app is trying to achieve.

  • Main menu

This is the main menu page of the app. It contains most of the things that you’re going to need to play around with. In the top-right corner, there’s a menu that opens up advanced options and an About+help section too.

  • Save battery

The Battery Save option underneath the Start Smooth Touch button lets you quickly set up some power-saving options that tie in with the speed-up touch. They’re not massively detailed, but we will have a look at them in the main body of the tutorial.

السبت، 20 فبراير 2016

#Hacker zone - Underclock for better battery life...


A few choice tweaks to your kernel settings can also extend the life of your battery Changing the clock speed is always about finding the right balance between power and battery life. Overclocking will likely require you to sacrifice a little of the latter.

Underclocking is the opposite: it involves reducing the speed of the processor in an attempt to extend your battery life.It isn’t a magic wand. Underclocking causes some tasks to take longer to complete, which offsets the benefits of having the processor using less power at its maximum level. Nevertheless, for some tasks it can be beneficial and switching the governor can have noticeable effects. As ever, the best approach is to experiment with settings to find ones that work for you. And don’t push things too far – if you set the processor clock speed too low it may not deliver enough speed for your apps to work. 

1. Set up the app

In EX Kernel Manager, create a backup of your existing kernel settings. Open the sidebar and select Tools, followed by Kernel Backup. Tap the disk icon to create the backup and give it a recognisable name should you need to restore it someday.

2. Reduce the clock speed

Now go into the CPU settings. Underclocking is the same as overclocking, except in reverse. Try experimenting with lower maximum frequencies, so that your phone runs at a slightly slower speed, causing it to use less power. Just don’t overdo it!

3. Change the governor

You also need to adjust the governor settings. The obvious one to use is the Powersave governor, which locks the CPU to the lowest frequency. However, you might do better with the Performance governor, so that tasks will complete in the shortest possible time.

4. Test the changes

Exit the app and then test your changes. Open a few apps or games and run a few common tasks. It’s likely that you’ll notice the phone is a little slower, but if it’s too slow then you will need to tweak your changes. You want to find a balance between speed and batter.

5. Explore Powersave mode

The EX Kernel Manager also has a Powersave utility. This is activated by tapping the leaf icon at the very top of the app’s screen. This mode sets the processor to run at predefined levels and enables you to quickly reduce power consumption.

6. Tweak settings

To change the Powersave mode settings, tap the three-dot menu icon and choose Settings. You can set Powersave to activate automatically on a certain battery level or hit Advanced settings to reduce the CPU speed even further. Again, keep your changes small.

Enjoy Great New Powerd Life....

الأربعاء، 23 ديسمبر 2015

A list of your most common smartphone questions and problems Wiith Solutions


  • Why is my phone hot? 


In the days of increasingly slim phones and metal rather than plastic cases, a phone that gets warm in use is not at all uncommon. All consumer tech can get hot in use, although there are three key things that will make your phone get hot: when it is being taxed with intensive tasks, while it is charging, and often when you have a poor signal. While some heat is normal, excessive heat isn’t good for your smartphone’s battery. You could try removing the case (or removing it from your pocket) to allow it to cool down a little, reduce the number of things you’re trying to do on it at once, and unplug it once it’s finished charging. If it’s really hot, you could also turn it off for a short while to give it a rest. Working out exactly where on the phone the heat is coming from can also help you work out how to tackle the problem – it could be the screen, the battery or the processor, for example. If you’ve recently installed a software update, this could also be causing problems.

  • Why is my phone so slow?


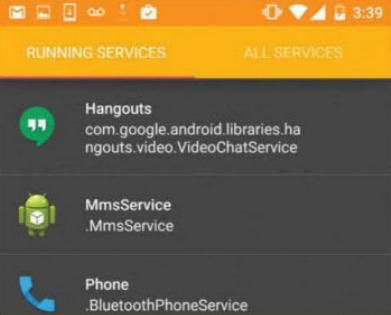
If your phone was once fast and is now slow, but otherwise seems to be functioning properly, the most common cause is a build-up of apps, data, temporary files and other junk. It’s also possible a particular app or software update is causing problems, although less likely. Even less likely is that malware is slowing down your Android phone. Go through your phone and remove anything you don’t need. Apps you don’t use can be uninstalled (including those that may have been pre-installed when you bought the phone – if you are able to do so); photos, video and other media can be backed up and removed; your Downloads folder can be emptied; and you can also clear your data cache. For the latter, head to Settings, Storage, tap on Cached data and then select Delete. You can also delete cached data for individual apps from Settings, Apps. Doing all this should speed up your phone, but it can take time. An easier option can be a factory resest, which will return your phone to its out-of-box condition, but beware that you will lose anything that is not backed up. We’re not just talking about photos and video here, since you will also lose your downloaded apps and any in-game progress not linked to the Play store. Rest assured that you will be able to re-download any apps previously bought from Google Play without paying again. If you’re sure you want to perform a factory reset, go to Settings, Backup and reset, Factory data reset. This process will remove everything from your device except Android itself. Files stored on a removable memory card will not be touched by a factory reset, but if your phone is still slow it could be the microSD card causing problems. First try removing it from the phone and see if performance is affected. If the microSD card seems to be causing problems, attach your phone to a PC and back up the memory card’s contents by copying everything over to the PC. Go to Settings, Storage and opt to format the card, then plug it back into the PC and copy back only the files you really need. If you later find some apps don’t work properly it’s likely because some of their files were installed on the memory card; just uninstall and reinstall them to get them working. Other things you can do to speed up your Android phone are to disable animations and extras, close multiple running apps, and if you have several try removing some widgets from your home screen. Sometimes the simplest fix is to restart your phone (some people can go months without doing so).


  • Why is my phone full?  


Phone storage is quickly filled with apps, data, photos, video, music and more. If your phone has only 4-, 8- or even 16GB of internal storage, it’s very likely that you will run out of space, at which point you may receive an ‘insufficient storage available’ error message when trying to download a new app. Even if you don’t think that you have too much stuff installed on your phone, remember that the Android OS alone consumes a couple of gigs. You can try the tips outlined above in ‘Why is my phone so slow?’ to claw back some storage space, or you can use some additional methods to gain more space. The easiest way to add storage is with a microSD card, if your phone supports one. Note, though, that not all apps can be saved to microSD. Other solutions include cloud storage, hooking up USB OTG storage and connecting to a wireless hard drive.


  • Why is my phone in Safe mode?


Safe mode is a useful feature when you’re troubleshooting a problematic Android phone, but it’s also easy to accidentally put your phone into Safe mode and then get stuck there. It’s easy to accidentally enter Safe mode (you’ll know you’re in Safe mode because it will be written at the bottom corner of the screen). On my Samsung Galaxy S6, for example, if I turn on the phone while holding down the volume-down button (easily done if it’s in your hand) then it will automatically enter Safe mode. On other phones, you might enter Safe mode by pressing and holding the power off option in the power button menu for a few seconds, then simply accepting the prompt that pops up without paying attention to what it is asking you. Getting out of Safe mode is usually as simple as restarting the phone. If you find the phone is still restarting in Safe mode it’s likely your volume button is sticking or there is another hardware issue at fault.


  • Why is my phone saying no SIM?


If your phone is reporting that no SIM is installed then the most likely explanation is that your SIM is either not installed or incorrectly inserted. Try taking the SIM out the phone, ensuring that it’s clean (and that the space inside the phone is also clean), and reinserting it correctly. If it sits in a SIM tray, ensure the tray is the correct way up and fully pushed in. (Incidentally, if you’re having trouble removing your SIM tray, push harder on the release pin.) Also try restarting your phone and checking that all software updates have been applied. If it is a brand-new SIM then it’s possible it hasn’t been activated. Contact your mobile operator for help. If you’re absolutely certain that your SIM is activated and correctly inserted and the phone is still reporting no SIM or SIM missing then it’s most likely a problem with either the hardware or the SIM itself (if it’s damaged then request a replacement from your mobile operator), or your service has been cancelled (again, contact your mobile operator). The best way to check for sure whether it is your phone or the SIM at fault is to borrow a friend’s SIM and check whether it is recognised by the device. If you have no service you either have no reception (in which case it will allow you to make emergency calls only) or there is an issue with your SIM card. If you have no reception on your phone also check you haven’t got it in Flight mode – look for an aeroplane icon in the notification bar.


  • Why is my phone eating so much data? 


This may not be the answer you want, but if your mobile phone bill is high then it’s because you’ve been overspending, possibly without realising. With most mobile contracts now offering free minutes and texts, it’s usually data that is to blame. However, it’s worth checking your phone bill to see how many minutes and texts you use on an average month and upgrading your package if necessary. Data is what’s usually behind huge phone bills. Even when you think you’re not using it certain apps will be running services in the background, periodically checking for new emails or weather updates and the like. One fix for this is to connect to a Wi-Fi network whenever possible and keep tabs on your mobile data usage.
  You can set an alert for when you’re nearing your data allowance, then opt to turn off mobile data until the month is over. As with minutes and texts, check your bill to see how much data you’re using. If necessary, upgrade your contract or add a data bolt-on. An extra fiver a month might not sound good now, but it will prove a lot cheaper when your operator begins charging you £6.50 for every 250MB you go over your limit. Services such as WhatsApp use a tiny amount of data, but streaming video and downloading large apps can quickly eat through your allowance.
   We can’t tell you exactly how much data you need without knowing your personal circumstances, but personally I have never been able to stick to anything under 2GB. Now I have a 4G contract it’s easy to eat through data much quicker than I realise, and I have therefore upgraded to a 6GB contract. That seems to be sufficient for me personally.
   Roaming is another cause for huge phone bills. When you go abroad you are charged more for the calls, minutes and data you use, even if they are free on your contract back home. A solution to this is to turn off data roaming (Settings, Mobile Networks, Data Roaming), but if you still want to be able to use your phone abroad, you need to work out how to do so as cheaply as possible before you leave home.
   All mobile operators have plans that let you use your UK minutes, texts and data abroad for a fixed price per day. Three has also introduced its Feel At Home programme, whereby it doesn’t charge you for roaming in several European countries. If you haven’t been using your phone abroad, and are certain you aren’t overspending on data, text or minutes, check an itemised bill to see exactly what you’re being charged for. If you’re having problems managing your phone bill, speak to your mobile operator who will be able to advise you on what to do next and also, if necessary, set an expenditure limit on your account.

You Might Also Like :- Hackers View Android Smartphone Tips & Tricks - 01

  • Why is my phone roaming?


If your phone is ‘roaming’ then it means you are accessing a different network to your home network. Be aware that when using your phone abroad you will be charged extra for the minutes, texts and data you use unless you are subscribed to a special roaming package (see above). You can turn off data roaming in Settings, Mobile Networks, Data Roaming. Note that even when you turn off data roaming you will still be charged for any calls and texts you make, but not those that you receive.

  • Why is my phone battery so bad? 


All batteries degrade over time, but even new phones can struggle to make it through a full working day thanks to increased usage, larger, higher-resolution screens, more powerful hardware and so forth. Rather than going out of your way to change the way you use your smartphone to improve battery life, our favourite ‘fix’ is to carry a portable power bank, so you’ll never run out of juice. The truth is it is incredibly difficult to ‘fix’ poor battery life, because it’s very rarely one definable thing that is causing the problem. If your phone’s battery is removable, a ‘fix’ may be to buy and fit a replacement battery. Most flagship phones these days do not allow the user to access the battery, however, and if it’s a software issue then fitting a new battery won’t help. Software updates that haven’t been optimised for your phone’s older hardware are a common problem, but other than waiting for the manufacturer to roll out a new update there’s little you can do. There are plenty of tips you can try that may or may not improve your situation. Restart your phone every once in a while. Take steps to avoid your phone becoming too hot (see above) or too cold. Turn down screen brightness and adjust the screen timeout setting. Turn off Bluetooth and Wi-Fi when you’re not using them. Close multiple apps running in the background. Turn off haptic (vibration) feedback. Turn off live wallpaper and animations. Reduce the phone’s volume when playing media. Take advantage of power saving modes. Unplug your phone once it’s finished charging.

  • Why is my phone charging slowly? 


When you need to charge your phone quickly before you leave home, the last thing you need is to find your phone is charging slowly.
   In order to ‘fix’ this issue we need to look at the hardware you’re using to charge your phone. If a phone has for no apparent reason suddenly started to charge slowly then it could be an issue with the USB cable, the charger, or even the phone’s battery or charging connection itself. First, the USB cable. It’s often recommended that you use the USB cable supplied with the phone for charging. You absolutely don’t need to do that, but it’s a way of avoiding you using some cheap, inferior cable in its place. You should also check your cable for damage, and that the connector itself still fits snugly in the phone. If in doubt, get a new cable. Also check that the connection on your phone is free from dust and grime.
   Secondly, the charger. These days it’s becoming increasingly rare that a mains adaptor is supplied with your smartphone. This makes sense, given that you don’t need multiple identical chargers for every piece of consumer tech you own. However, it also means you could be using an old USB adaptor that is underpowered for your device. Worse still is when USB chargers are supplied with your phone, but they don’t offer the fastest way to charge that phone. (We’d rather not have one supplied.)
   When we talk about charging phones we tend to talk about standard-, fast- and quick chargers. Standard phone chargers are typically rated at 5W, but most modern smartphones will accept a higher wattage, such as that offered by the chargers typically sold with tablets. What we call ‘fast’ chargers may offer between 10- and 12.5W, which means you could potentially charge your phone in half the time. Quick Charging is a Qualcomm technology supported by many flagship phones running certain Snapdragon processors. Quick Charge 1.0 can reduce charging time by up to 40 percent over standard chargers, Quick Charge 2.0 by up to 75 percent, and the newly announced Quick Charge 3.0 by up to 80 percent. In order to benefit you must use a compatible charger, however. If you’re not sure how much power your phone will accept, don’t worry. It will draw only the power it requires.
   Wireless chargers (typically 5W) and a PC or laptop’s USB ports (2.5W USB 1.0 and USB 2.0, 4.5W USB 3.0) will charge a phone much slower than can a USB mains adaptor, so if you’re in a rush don’t use one of these
   Other tips thrown around for improving phone charging are to remove the case (there by avoiding heat build-up), and to turn it off or put it into Flight mode. Try not to use it while it’s charging either. As in our previous answer, our preferred solution is not to worry about how long your phone takes to charge before you leave home, but to carry a power bank so you can recharge it wherever you are.

  • Why is my phone data so slow? 


First, it’s important to note the differences between mobile connectivity standards, as we’ve explained in our guide to mobile connectivity. 4G is the fastest mobile data connection, with Wi-Fi like speeds for accessing the mobile web. Indeed, it’s the next best thing to connecting to Wi-Fi for getting online from your phone. However, not all of the UK is covered by 4G networks, and not all phone contracts include it – check with your mobile operator whether you would be able to benefit from 4G. 3G is also usefully fast for browsing the internet from a smartphone, but anything other than this (such as GPRS and Edge) are too slow to even think about using to get online. If you are connected to either 4G, 3G or Wi-Fi on your phone and your internet is slow, it may be a problem with your connection or signal strength. If your internet is slow you should ensure you don’t have other internet tasks running in the background slowing down your connection, such as app downloads (you can set these to download over Wi-Fi only within Google Play). Sometimes we find closing and restarting the browser can make a huge difference if it gets stuck trying to load a page. 
   You can also increase the amount of memory available to Google Chrome. In your smartphone browser head to chrome://flags/#max-tiles-forinterest-area and change the drop-down from default (128MB) to 512MB. Tap Relaunch Chrome to save the changes. Occasionally it can be congestion or a problem with the mobile network causing internet problems, too. A good idea is to check Twitter to see whether others are experiencing the same problems. If your internet is not working at all, check that you don’t have the phone in Flight mode (look for an aeroplane icon in the notification bar).


  • Why is my phone speaker so quiet?


Pressing the physical volume buttons on an Android phone let you alter the volume for calls and notifications, alarms, media and system sounds; these controls are also available within the Settings menu. If you find your phone too quiet when you’re talking on the phone then it’s actually the incall volume you need to increase. This is easily achievable using the volume keys, but only while a phone call is active. Once you reach the maximum in-call volume you will hear a beep.
   If your phone’s speaker is too quiet when playing music without earphones, check that it isn’t being muffled - if the speaker is at the rear you may need to remove your phone case, hold it differently so audio isn’t directed into your palm, or place it face down. You should also check you have the media volume turned up, accessible from the Settings menu or by pressing the physical volume buttons while music is playing, a video is streaming or a game is being played.


  • Why is my phone rooted?

A rooted phone really isn’t as scary as it sounds, and it can be treated exactly like an unrooted phone if you have no desire to take advantage of its root control. Rooting an Android device is the process of gaining privileged or full control of the operating system. It’s a bit like having a VIP pass at a gig, which allows you to go anywhere you like and do anything you want (within reason). Rooting an Android smartphone or tablet is effectively the same as ‘jailbreaking’ an iPhone. Whereas most smartphones sold in the UK are sold unrooted, elsewhere in the world – particularly China in our experience – they are more frequently sold rooted. Learn more about rooting Android in our next feature...


الثلاثاء، 1 ديسمبر 2015

Improve your battery life

Running your QHD device in full HD mode can make a huge difference to your device’s performance


A lot of flagship devices now feature a QHD screen with a resolution of 1440 by 2560 pixels. As the name suggests, this is equivalent to four times HD and on a 5.1-inch screen (as seen on the Galaxy S6), it equates to around 577 pixels per inch. Even compared to full HD (1920 by 1080), QHD offers over 1.6 million additional pixels! While this is extremely impressive, the reality is that for many people there is actually no visible difference at this small screen size between the full HD and quad HD. Indeed, this is why many manufactures have opted to stick with full HD resolution screen for their flagships.
While the benefits of such high resolution display are arguably minimal, there are definite downsides. Driving such a high resolution display puts additional load on the system components, primarily the graphics processor and memory, which in turn can lead to reduced performance and battery life. particularly when gaming or using similarly intensive app, having to deal with so many additional pixels can have a real impact on the experience. Thankfully, if you are a user who is comfortable with some relatively basic hacking of your Android device, there are ways in which you can revert to a lower resolution.This can be done for the OS as a whole or for some devices on a per-app basis. If you use a FHD device already, you can drop to HD in the same way for similar benefits.

Steps:-

1. Root and back up

The resolution settings for your device are stored in a file located on the system partition of your Android device that is read-only by default. To edit the file, you have to root your device. Before doing so, ensure you have a way to return to stock as editing the file may prevent OTA updates from being applied.

2. Manually edit the build.prop 

You can manually edit the /system/ build.prop file to change your device’s resolution. To switch from QHD to FHD, adjust the ro.sf.lcd_ density line to 480 and the width and height lines to 1080 and 1920 respectively. Be warned, change the build.prop with care!

3. Use a build.prop editor to be sure

If manually editing the build.prop file is too daunting – and be aware, an error in the file can easily cause your device to boot loop – there are a number of build.prop editors available on the Google Play store. Build Prop Editor (Free) by JRummy works well for a safer modification.

4. Resolution Changer Pro

Resolution Changer Pro, also free on the Play store, is an app that is dedicated to changing your display’s resolution. Remember when you make modifications that the width and height values are based on a portrait orientation for phones and landscape orientation for tablets.

5. Samsung’s Game Tuner

If you have a Samsung device and you only wish to modify your device resolution for gaming, then you are in luck! Samsung has recently released Game Tuner via the Play store to permit custom resolution and FPS settings on either a universal or a per-game basis.

6. TV or monitor connections

One situation where you might particularly want to customize the resolution of your device is if you are connecting to a monitor or television. Resolution Changer Pro (see step 4) enables you to choose an additional resolution to be applied when an external display is connected.

7. Density adjustments

After you have changed your resolution, it’s worth investigating the effects of just changing the density. A higher density shows more data on the screen, but be aware, not all apps will perform correctly at custom densities so trial and error may be needed!

8. Check screen resolution

After you have applied your updates and rebooted (changes don’t take effect immediately), everything will probably look the same! To be sure your changes have been applied, use an app such as Screen Resolution & Specs by K. Lee, free from the Play store.

9. Benchmark improvements

Another interesting step to take is to use benchmarking tools to see what level of performance improvement is being experienced. Since lowering the resolution will decrease the load on the graphics processor, GFXBench is a good tool to use to measure changes.

10. Make temporary changes

Although build.prop changes are only applied after boot, some tools use Android shell commands to apply changes with immediate effect, which is ideal for testing. NOMone Resolution Changer from the Play store is an ideal app for experimenting with densities.

الخميس، 24 سبتمبر 2015

Redesign AOSP with WanamKit

Better known for customing TouchWiz, Wanam Kit also Works With Vanilla Android too


There are countless Android ROMs out there, but unless you build the ROM yourself, chances are there are always going to be one or two things you would like to change. Wanam Kit originally found fame as a means to de-bloat Samsung’s TouchWiz user interface, which was notorious for its excessive bloatware until the Galaxy’s S6 feature cull. However, Wanam Kit also works with stock ROMs as the Xposed module lets you make a wide range of tweaks to any ROM based on the Android Open Source Project (AOSP). These customization include visual changes such as replacing the standard battery icon, to more functional changes such as disabling lollipop’s new heads-up style notification system. Once you’ve installed Wanam Kit, you can make your changes by exploring the app’s various menus and then disabling or enabling the different options as desired. Before any of these changes become active, you need to reboot your device, so the only downside is that if you want to experiment with a few different changes then you may need to reboot several times before you’re happy with the end result. This module requires root access and the Xposed framework. If you haven’t installed Xposed, Lollipop users can find the necessary files and instructions at the XDA Developer thread goo.gl/DFXwGg. If you’re running an earlier version of Android, you can install the Xposed framework via an in-app updater, available from goo.gl/PAGTpi.

Steps:-


  • Activate Wanam Kit

Download Wanam Kit (Xposed) from the Google Play store. Open your Xposed Installer, tap Modules and make sure that Wanam Kit is selected. To activate this module, reboot your device. Then open your Wanam app. At this point, you’ll see the main Wanam menu.


  • Customizable status bar
Select Status bar. In this section, you can customize the stock status bar, including changing the battery icon. You can replace it with a circle battery icon, hide the battery icon completely, or display the percentage of battery remaining by selecting ‘Show Battery Text’. 

  • Tweak your battery text
If you do choose to ‘Show Battery Text’, you’ll get access to some additional options that allow you to customize this battery text. You can change the colour of the text, the typeface/font used, and the typeface style by choosing from Italic, Bold or Normal.

  • Edit or hide your clock position
You can change the position of the digital clock that appears towards the right of the status bar. To make this change, tap Clock position and choose from Right, Center or Left. You can also remove the clock completely by tapping Clock position and then Hide.

  • More detailed notifications 
Do your notifications fail to give you enough details at a glance? You can enable the ‘Expand all notifications’ option so that all notifications appear expanded. The Status bar section contains several options, including enabling and disabling Lollipop’s heads-up notifications.

  • Additional options for notifications
When heads-up notifications are enabled, you have additional options. If you have a habit of dismissing notifications and forgetting to act on them, you can enable Ongoing notifications. You can also increase the delay before you can dismiss a notification using ‘Heads up delay.’ 

  • The advanced power menu
If you’re constantly booting into your bootloader or recovery, you can save time by adding these to your power menu. Exit the Status bar and select System from the main. Select Advanced reboot > Reboot options and select Soft reboot, Recovery or Bootloader.

  • More menu options 
There are two other options you can add to your advanced power menu. The first is Enable mobile data where you add an option to turn your mobile data on and off. The second is Quick dial, where you add a telephone number to your power menu.

  • Quick dial shortcut 
To add a quick dial shortcut to a telephone number of your choice, tap Quick dial number and then enter the telephone number. If you want to disable this feature at any point, select Quick dial number again, but this time delete the entire number and tap OK.

  • Improve device’s performance 
Even if you dismiss an app, it can leave processes running which has an impact on performance. Using Wanam, you can kill all processes running in the foreground; just long press your device’s Back button. To activate this functionality, select ‘Long BACK kills process’.


Hide your root access from prying apps

Just because you rooted Android shouldn’t mean you can’t use your favorite app...


 You’ve rooted your phone or tablet and can now enjoy previously unavailable apps and additional functionality. The problem is, some of the apps you were using previously no longer run. In order to maintain the integrity of their products, some app developers opt to disable their apps (or restrict them) if they’re found to be running on a device that has been rooted. If you’ve spent some time trying to get your device rooted (we all know that it isn’t always easy) then this can prove particularly frustrating. To work around this, you will need to fool these apps into thinking that the phone has not been rooted at all and for this you will need RootCloak Plus, which requires the Xposed Framework. While there are other solutions are available (such as the Hide my Root app by Amphoras on Google Play), RootCloak will give you the best results.

Steps to go:- 


  • Ensure Xposed has been updated

Before installing RootCloak, ensure your Xposed Framework is up to date. You need v2.4.1+ with XposedBridge v42+ installed. Open the app, go to Framework> Install/Update to confirm this and wait while the framework updates.

  • Install RootCloak

Next, browse Xposed’s Download section for RootCloak and install by tapping Download. Follow this by rebooting your phone: tap Framework> Reboot. You will now be able to start configuring RootCloak to hide or cloak your root status from certain apps.

  • Problematic apps

The chances are that any apps that are causing you trouble have already been included in RootCloak’s list. This means you don’t need to configure the app! To check, open the app that was complaining about your rooted phone and see if it displays a nag message. 

  • Configure RootCloak

Xposed-compatible apps can be opened from your Android launcher without opening Xposed Framework first. Open RootCloak from the launcher and view the menu. You’ll mostly use Add/Remove Apps for this, but if the app you want to block isn’t listed, tap + to add it.

  • Stop blocked app

If the app you’re trying to run continues to nag you about your phone’s root, it’s likely that you will need to stop it. Open Settings > Apps, find the app in question and tap Force Stop. This will require the app to restart and check permissions before launching

  • Last resort

Using RootCloak should help you persuade root-phobic apps to run, but if this doesn’t work check the Debug log where you should find answers. With persistent issues, run the app in a non-rooted environment, maybe an Android tablet or switch to a more usable app.

السبت، 5 سبتمبر 2015

Save battery by killing background services - Hackers Trick

Sweep your device for battery-hogging apps that are running in the background

We all want to make the battery on our Android devices last a little longer, but this isn’t always easy when apps and services run in the background without your knowledge. Maybe this is because an app is misbehaving, or perhaps you’re in the bad habit of never closing your apps properly. [root] Servicely is an app that periodically checks what’s running in the background and if it finds a service that appears on your [root] Servicely ‘hit-list,’ it kills that service. Since [root] Servicely scans the background only, you shouldn’t encounter any problems with the apps you’re interacting with in the foreground. For example, if you add Facebook to [root] Servicelys hit-list, it won’t kill this app when it’s visible on screen. However, once you send Facebook to the background, the next time [root] Servicely performs its sweep, it’ll kill the Facebook app. Please note that [root] Servicely does require root.

You Must Also Check Out:- Boost your battery with IFTTT recipes

Steps to Save Battery:- 


  • Create your hit-list 

Download [root] Servicely from Google Play, then launch it and grant super user permissions. To tell [root] Servicely which apps to kill if it catches them running in the background, tap ‘Add a new app to the hit-list’ and then tap all the apps you want to add.

  • Identify problem apps

Pay particular attention to the Running Services area as this is helpful for targeting apps that are running in the background without your knowledge. Also be on the lookout for apps marked ‘Can wake-up the device’ as these are the ones that can really eat into your battery.

  • Enable [root] Servicely 

After selecting some apps, create your hit-list by tapping the checkmark. To double check the contents of your hit-list, go to the main screen and swipe to Hit-List. Tap the slider in the upper right and [root] Servicely will now monitor the services running on your device.

  • Change interval period

By default, your running services are checked every 60 seconds. To change this, tap Interval Period… and enter a new value. If you find [root] Servicely is killing apps you’re still using, try turning the Aggressive Process Termination slider off. 

  • Pro features


You can unlock additional features by purchasing the Pro version. To upgrade, tap Upgrade to Pro and follow the instructions. Once you’ve upgraded to Pro, you can set up the app so it automatically starts whenever you turn your device on (Start on Boot).

  • Advanced mode

The pro version also lets you Disable Individual Services, which is useful if there are features of apps you never user. However, disabling services randomly can cause problems with your device so make sure you know exactly what a service does, before you disable it.